Incubation and brooding by artificial means
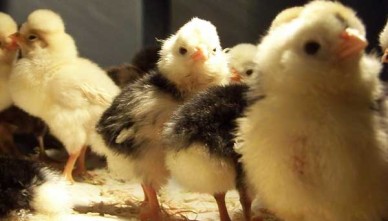
If you decide you would like to hatch some chicks and don’t happen to have a broody hen to hand then you will have to consider using some artificial method of incubation and brooding. These days there are all manner of high tech devices that will automate the job for you so it’s easier than ever to get good results, with relatively inexpensive equipment, at home.
Before you start incubating
Before you even start you should consider several things that may present issues later in the process.
Where will you source your eggs?
There are several options available, some more reliable than others. Obviously you can use your own if you have a cock running with your hens. If he is actively treading you can be pretty sure that, depending on exactly how many hens he is in with, most eggs will be fertilised – he’ll be trying his best anyway. You could also contact breeder groups for the type or breed of bird you wish to hatch and they will be able to tell you your nearest member who is supplying hatching eggs. This is a good option as they may be local enough for you to visit, see the breeding stock, and assure yourself of the likely quality of offspring. If you are not so fussy about breed there may be other local breeders able to supply hatching eggs at certain times too.
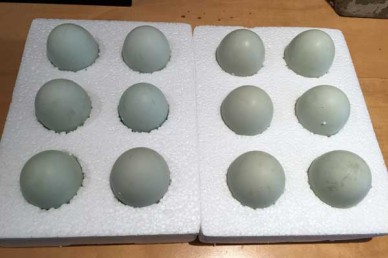
Eggs received through the post should be allowed to rest pointed end down for 24 hours before beginning incubation
Your other option is to buy eggs directly from the internet which is a great way to source all manner of eggs for unusual breeds of poultry but you do have to remember that they run the gauntlet of the postal system. I know people that have had excellent results from eggs sent in the post but conversely I have had also heard of terrible hatch rates or eggs that arrive damaged or broken. Many suppliers will replace eggs if you have a certain percentage that don’t develop but often insist you send them back for checking first so check terms before you buy.
You are likely to get over 50 per cent cockerels
Many people don’t want even one male to deal with so you need to know what you intend to do when you are suddenly presented with several at one time. You can expect more than 50 per cent of chicks to be males and 60 per cent or more is not unusual. It’s a hard fact of life that most cockerel chicks will be euthanised as soon as they can be identified – which can be as young as day old for auto-sexing breeds.
You may want to keep a cockerel to start your own breeding stock and for this you will want to ensure that he is unrelated to your hens to avoid genetic problems but unfortunately further discussion of this is way beyond the remit of this article.
They can be grown on for meat if you have space and should be okay together until they reach a reasonable size but you will have to separate them should they start fighting.
There may be other options especially if you have a local zoo or animal park that might be able to use chicks or fully-grown birds as feed for reptiles, birds of prey or carnivorous mammals but they may insist on some guarantee that they are disease free. However, larger numbers would need to be disposed of via a local government approved method.
Housing hatched chicks
It is quite unlikely that all your eggs will produce chicks but you should be prepared for a scenario where you have to brood and house the full compliment if you are lucky enough to get a full hatch.
Incubation
An incubator needs to provide the correct environment for hatching. This means the right temperature and humidity to simulate the natural environment. This is different for the various types of poultry as shown below.
| Type |
Incubation |
Incubation |
Humidity |
Humidity |
*Stop turning |
|---|---|---|---|---|---|
| Chicken | 21 | 37.5 | 50-55 | 65-70 | 3 days |
| Duck | 28 | 37.5 | 55-60 | 65-70 | 3 days |
| Turkey | 28 | 37.2 | 50-55 | 65-70 | 3 days |
| Quail | 18 | 37.5 | 55-60 | 65-70 | 2 days |
| Guinea | 28 | 37.5 | 50-55 | 65-70 | 3 days |
The temperature may need to be increased by a degree or two if you have a still air incubator as oppose to a forced air (fan-assisted) one. You should also take the temperature reading at a point just above the eggs.
* Amount of days before hatching you should stop turning the eggs
Most incubators will come with detailed set up and operating instructions which you should read and follow carefully as they can vary significantly from model to model. In still air models it can be more difficult to maintain a constant temperature so consider this when making your purchasing decision.
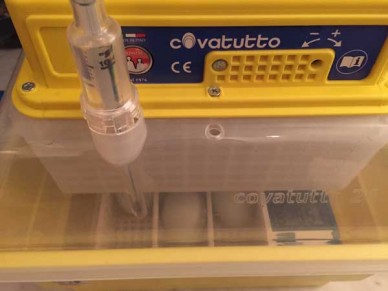
Incubator containing chicken eggs showing correct readings for both temperature and humidity
You should situate your incubator in an area that has a fairly constant ambient temperature. It should also be away from draughts and direct sunlight preferably somewhere dimly lit.
Cleanliness is vital so you should always wash your incubator before and after every hatch. Use warm soapy water, being careful to avoid any electronic components where necessary. A wipe over with Milton fluid is a good additional precaution.
Always start your incubator running 24 hours ahead of placing your eggs. Make any adjustments to temperature or humidity as required and then check that you can maintain the correct levels consistently. Temperature doesn’t need to be exact but try to keep it within a degree either side of the ideal where possible. Humidity is affected by the surrounding conditions so you may need to decrease or increase the surface area of the water reservoir to achieve the correct level. This can be achieved by covering the reservoir with foil or cling film or adding another water container or a wet sponge into the evaporation chamber respectively.
Water added to the incubator should always be tepid, not cold. Don’t worry too much about temperature changes caused by raising the lid of your incubator to replenish water as, even in a natural scenario, the hen would occasionally leave the nest to eat, drink or relieve herself.
Setting the eggs
Eggs should be as fresh as possible as the chances of successful development reduce over time and any over ten days old should be discarded.
Very dirty eggs should not be used but small amounts can be brushed off. Never wash eggs before placing as this will make the eggs more vulnerable to ingress of bacteria.
Eggs that you receive in the post should be stood to settle with their pointy end down for 24 hours before placing in the incubator.
A mother hen will turn the eggs occasionally to stop the yolk sticking to the shell and it is important to ensure that you have some mechanism in place to ensure this happens in the artificial environment too. Many modern incubators have an auto turning feature which saves you having to remember but manual turning three to four times a day is usually sufficient to avoid problems. You could mark the eggs with a pencil to help you remember when they were last turned if necessary.
Towards the end of the incubation period the eggs should stop being turned to allow the chicks to orientate for hatching. For chickens this is three days but it can vary for other poultry as shown on the chart earlier. At this point the humidity is also increased slightly to about 65-70% using the method described earlier.
All going well your chicks will hatch on time. Before hand you should start to notice pipping (chipping) where the chicks starts to break out of the shell, you may also start to hear noises from within. Pipping can start up to a day ahead of hatching although you can never tell and some chicks will be out in less than an hour after it starts.
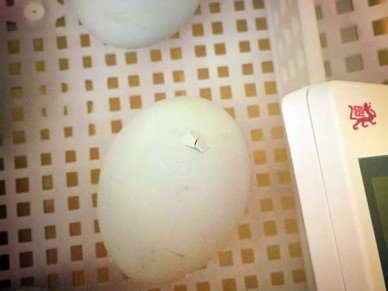
Exciting times: Pipping – where the chick starts to break out of the shell – can start up to a day before hatching
Don’t be tempted to open the incubator while chicks are hatching and leave them in there for 24 hours to dry and fluff after they have hatched. Note: While some may come up to a day early any left 24 hours after their specified time are unlikely to produce chicks.
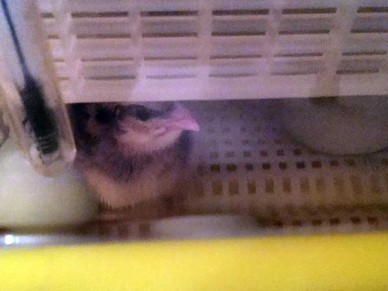
Leave chicks in the the incubator for 24 hours after hatching to dry thoroughly
Some chicks may not survive the hatch and may get stuck at some point during chipping their way out. Although I have seen it work, intervention rarely helps, as these will often be weak birds that can develop problems later on.
Candling eggs
Candling is the technique of shining a bright light into an egg to allow you to determine if it is developing as expected. Whilst not strictly necessary it is advised as eggs that don’t develop and go bad can split or even explode which then causes problems with bacteria for the remaining eggs.
The technique is very simple and, even to the untrained eye, the tell-tale signs of a developing chick can be seen from about four days. However, four days is a crucial stage of development so eggs are best left until 7-10 days for a first look when it will also be more obvious which are developing and which were infertile or have stopped.
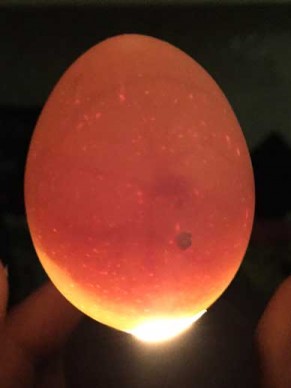
Clearly visible the tiny growing embryo and blood vessels at four days old
You can get special candling torches but any high-intensity, low-heat light source will do. LEDs bike lights are great and even bigger torches can be used by shining the light up through an egg rested on a cutout in a cardboard box. Just avoid heating the egg up too much
Start shining the light through the fat end (this is where the air sac is) of the egg and adjust positioning to give a better view if necessary. Thicker or darker egg shells can make it more difficult to see development.
Those that show no signs of development should be discarded but if you are unsure, gently mark them, return them to the incubator and try looking again in a few days time.
Brooding
When the chicks are dry they can be moved to a brooder box. This can be bought but, for small-scale hatchings, brooder boxes often made from large plastic storage boxes or other large high-sided container. You will need to supply a heat source until the chicks are fully feathered. For a small amount of chicks you can often get away with a 60 watt fire glow light bulb but for more you may want to invest in a infra red brooder lamp, which can be suspended over a larger brooding enclosure, or an electronic brooding device.
Initially you need to provide the same temperature as the incubator but this can be reduced each week by about 5 degrees by moving the heat source up. You will get a good indication as to if you have it right from the chicks themselves. If they are too cold they will huddle together tightly and may sound distressed, if they are too warm they will stand away from the heat source and may pant.
Current thinking advocates special anti-slip matting as a liner for the brooder to protect from splayed leg in the developing chicks. I have found this is good for the first couple of days but I tend to return to dust extracted wood shavings after that. Sawdust is a definite no-no as it is bad for both respiratory system if dust is inhaled and digestive system if eaten. Clean play sand is also used to good effect.
They will make a mess and will poo anywhere and everywhere so clean them out regularly to deter bacteria or other pests from colonising the brooder.
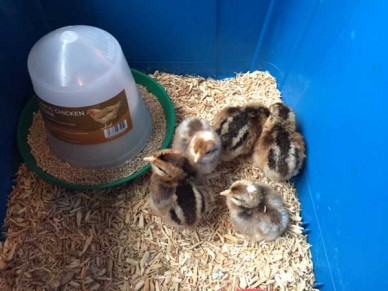
Feeding chicks
Chicks can happily survive on the remaining yolk they have absorbed during the first 24-48 hours but it is best to have food and water available in the brooder from the outset. ‘Introduce’ the chicks to the water so they know where to find it. Special chick drinkers are essential as they can easily drown even in the relatively shallow water of an open dish. Feed chick crumb developed for the breed of bird you have hatched to ensure they have the correct balance of nutrients. Medicated crumb can protect against conditions, such as coccidiosis, that can kill chicks very rapidly but is not suitable for all poultry and especially not ducks or other waterfowl.
As the chicks grow
As they grow you may need to move them to a larger enclosure, still with a heat source, until the feathers are fully formed. At about 6-8 weeks they will be ready to move to their own coop and can be started on growers pellets (crushed slightly and mixed with crumb initially) until they reach maturity at about 18-20 weeks.
Poultry categories
Most recent Poultry articles
- Preventing egg laying problems in older hens with implants 15th March, 2017
- Integrating new chickens into an existing flock 15th May, 2016
- The nests in my heart – a personal view of ex-battery hens 22nd March, 2016
- Chicken FAQ: your most common chicken keeping questions answered 19th January, 2016
- Hens and herbs – no this is not a chicken recipe 08th October, 2015
- Feeding chickens: a balanced diet for backyard hens 16th April, 2015


Leave a reply